Allen Mogul Pony Pivot Repair: Difference between revisions
| Line 32: | Line 32: | ||
File:MogulPonyPivonRepair 3176.jpg|The final operation for this part is to debur the threaded hole. I placed a 7/16 inch drill in the tailstock, and gently applied pressure to the unlocked tailstock while turning the three jaw chuck by hand. One or two turns is all that is necessary. Be careful not to cut too deeply. | File:MogulPonyPivonRepair 3176.jpg|The final operation for this part is to debur the threaded hole. I placed a 7/16 inch drill in the tailstock, and gently applied pressure to the unlocked tailstock while turning the three jaw chuck by hand. One or two turns is all that is necessary. Be careful not to cut too deeply. | ||
File:MogulPonyPivotRepair 3181.jpg|Now we turn our attention to the cover plate. Paint the part with layout fluid and allow to dry. Use an Xacto blade or other scribing tool to layout the five holes to be drilled. Refer to the Allen Mogul drawings. Be sure to verify with direct measurements to the mounting holes in the bottom of the saddle, as the builder may not have precisely following the drawings. | File:MogulPonyPivotRepair 3181.jpg|Now we turn our attention to the cover plate. Paint the part with layout fluid and allow to dry. Use an Xacto blade or other scribing tool to layout the five holes to be drilled. Refer to the Allen Mogul drawings. Be sure to verify with direct measurements to the mounting holes in the bottom of the saddle, as the builder may not have precisely following the drawings. | ||
File:MogulPonyPivotRepair 3184.jpg|Center punch the four outer holes in the cover plate. Make a pilot dimple for each hole using a #2 HRS center drill. Drill through each of the four corner holes with a 3/16 inch drill. Debur the four corner holes, front and back, using a 1/4 inch drill. Drill the center hole with a 1/4 inch drill. Debur front and back with a 3/8 inch drill. The photo shows the newly completed parts next to the broken casting. | |||
File:MogulPonyPivotRepair 3188.jpg|The new components are assembled for a test fit on the pony truck. A 1/4-20 bolt is inserted through the backside of the cover plate. The pivot is threaded onto the bolt and tightened. A lock washer and self locking bolt complete the assembly. The original drawings specify using a much longer pivot bolt with a spring arrangement. I felt the bolt came too close to the track. By reducing the diameter of the pivot point the truck naturally has more room to "wiggle" (especially vertically). Notice the bolt is not tightened onto the lock washer. The lock washer is acting as a small spring in this case to keep the pony truck pushed up against the pivot point. | |||
</gallery> | </gallery> | ||
Revision as of 00:01, 13 October 2013
by Daris A. Nevil
I heard stories about how much maintenance goes into a live steam locomotive. Now that I'm an owner I am finding that I have to do some kind of repair or maintenance following almost every run. Most of what I have done has been to improve operation or change operation to my preference. But #486 experienced some real damage on a run at the Annetta Valley & Western Railroad during a recent run.
The Incident
A cool front blew through north Texas August 17, 2013. It was the first break in the heat all summer, so I took advantage of the opportunity. I made the first run on the track that morning. Unfortunately, the track had not been "walked", and as #486 began its climb out of Stamey Loop I noticed a 1/2 inch stick across the rails. I didn't have time to stop, and hoped the cow-catcher would throw the stick clearn of the tracks. Well, it didn't, and old #486 went right over it. The pony truck went right over it, followed by all six drivers. They didn't event derail! But the tender did, so I stopped to clear the track and re-rail. All seemed find, but I found that the pony truck kept derailing in curves. Another engineer passing by pointed out that #486's pony truck was not tracking straight. I got down on my hands and knees and noticed the pony truck pivot pin was missing.
By this time I was far from the engine stands. The same helpful engineer suggested I run backwards back to Terry Town Station. That worked like a charm, and I didn't derail anymore.
Upon closer inspection I realized that not only was the pivot pin missing, but the pivot bearing had broken off.
The OEM part that had broken was Allen Models #201, "Center Plate". It is a cast aluminum cover for the bottom of the saddle. The casting includes a pivot point for the pony truck. This cylindrical pivot is what broke completely off during the impact with the branch.
The Repair
I decided to manufacture my own "Center Plate" from steel components, mainly because I did not want to wait for a replacement part. I also wanted a stronger material than cast aluminum. I also decided to reduce the diameter of the pivot so the pony truck would have more vertical freedom.
The photos below show how I made the replacement parts.
Broken center plate casting from Allen Mogul #486 after driving over 1/2 inch stick. Photos by Daris A. Nevil.
An un-machined casting, #201 "Center Plate", from Allen Models of Michigan.
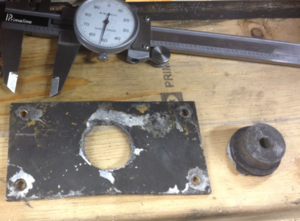
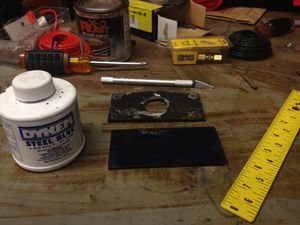
A broken #201 casting next to new steel components to be used to fabricate replacement on Allen Mogul #486. The pivot point is cut from 3/4 inch CRS. I used an abrasive chop saw to rough cut 0.6 inch length part. Cut a 4 inch length of 2 inch by 1/8 inch HRS steel for the plate.
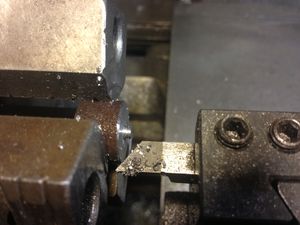
The 3/4 inch round stock is mounted in the three jaw chuck. It is faced at 400RPM and a 1/32 inch chamber is cut around the edge. The part is not faced all the way to the center, as it will be drilled out. This lessens the chance of damaging the cutting tool.
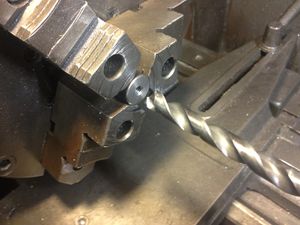
The 3/4 inch part is turned around in the three jaw chuck in order to turn the opposite face. The part is turned to 0.5 inches long. A center point is drilled in the part with a #4 HRS center drill
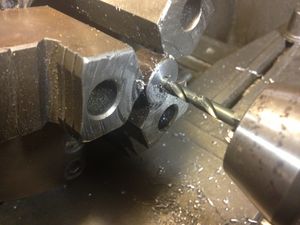
The hole is drilled through with a #10 drill.
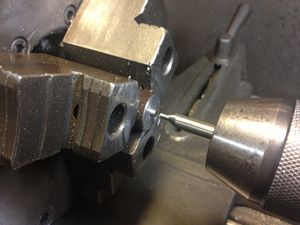
The three phase power is turned off to the lathe, the head is disengaged, and the part is threaded to 1/4-20 by manually turning the three jaw chuck. The tap is held in the tailstock. I like to lock the tailstock and gently feed the tap into the part until the threads are well established (about 2 or three turns). Then I losen the tail stock and let the the part "pull in" in the tap the rest of the way. The threads are cut all the way through the 1/2 inch long part.
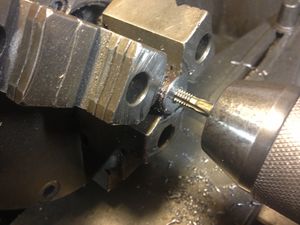
The final operation for this part is to debur the threaded hole. I placed a 7/16 inch drill in the tailstock, and gently applied pressure to the unlocked tailstock while turning the three jaw chuck by hand. One or two turns is all that is necessary. Be careful not to cut too deeply.
Now we turn our attention to the cover plate. Paint the part with layout fluid and allow to dry. Use an Xacto blade or other scribing tool to layout the five holes to be drilled. Refer to the Allen Mogul drawings. Be sure to verify with direct measurements to the mounting holes in the bottom of the saddle, as the builder may not have precisely following the drawings.
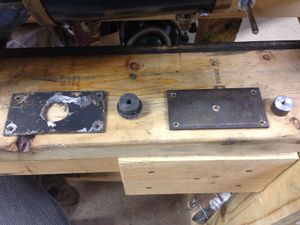
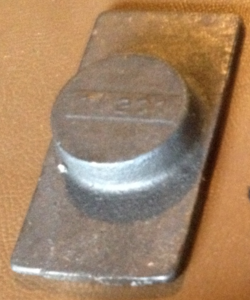
Center punch the four outer holes in the cover plate. Make a pilot dimple for each hole using a #2 HRS center drill. Drill through each of the four corner holes with a 3/16 inch drill. Debur the four corner holes, front and back, using a 1/4 inch drill. Drill the center hole with a 1/4 inch drill. Debur front and back with a 3/8 inch drill. The photo shows the newly completed parts next to the broken casting.
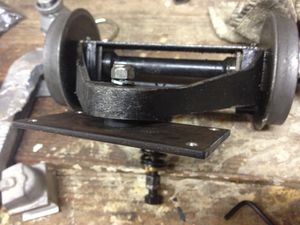
The new components are assembled for a test fit on the pony truck. A 1/4-20 bolt is inserted through the backside of the cover plate. The pivot is threaded onto the bolt and tightened. A lock washer and self locking bolt complete the assembly. The original drawings specify using a much longer pivot bolt with a spring arrangement. I felt the bolt came too close to the track. By reducing the diameter of the pivot point the truck naturally has more room to "wiggle" (especially vertically). Notice the bolt is not tightened onto the lock washer. The lock washer is acting as a small spring in this case to keep the pony truck pushed up against the pivot point.


